Just a couple of weeks ago, Samsung gifted the Galaxy J5 (2016) with Nougat 7.1.1 update. Also, the latest Samsung Experience 8.5 that came bundled with the package is just more than what the users dream. Though the update brings plethora of new features and other enhancements, there’ll be some folks still restless to obtain root access. Hence, here we’re providing the methods to root Galaxy J5 2016.

The root procedure we’re going to give is tested in Marshmallow 6.0.1 and works perfectly well. Similarly, it can also root samsung Galaxy J5 running on latest Nougat 7.1.1 as well. Moreover, the method is applicable for all J5 models(J510FN, J510F, J500H….etc).
PRE-REQUISITES
- Unofficial TWRP Recovery 3.1.1 for Galaxy J5 2016.
- Samsung Odin installed on your P.C.
- Flashable SuperSU v2.82 SR5.zip file.
(All Download Links are provided at the end of this post.)
Once, you’re ready with all of the necessary files. Let’s proceed step-by-step to successfully root Galaxy J5 2016.
Guide to Root Galaxy J5 2016
1. Flashing TWRP Recovery Using Odin
Warning: Flashing custom recovery, replaces the stock Android Recovery. In effect, your device warranty will be void, and Knox status gets tripped to 0x1. Proceed further, if you are very much sure about what you are doing. Importantly, we are not responsible for any damages that cause to your valuable device.
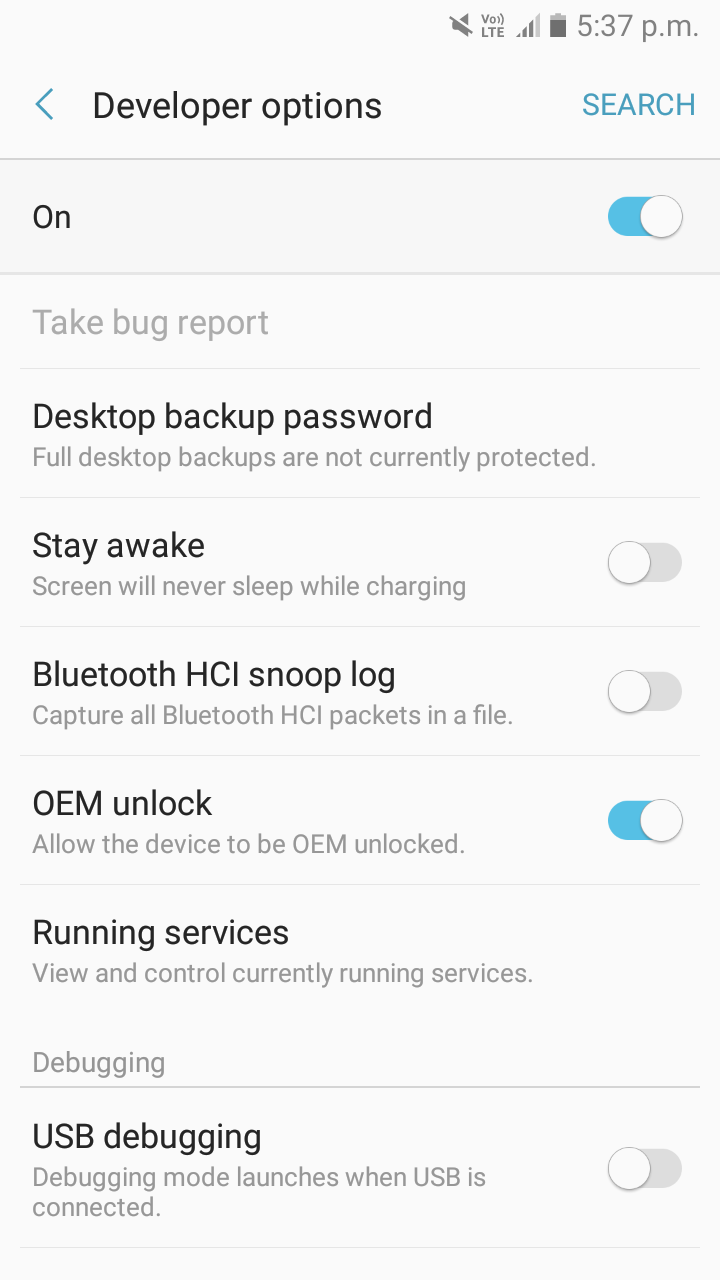
- Enable Developer Option(settings – about phone – Software information – Tap 7 times on build number to activate developer option in settings menu).
- Enable OEM Unlock. from developer option (Currently no workaround to leave this disabled. If you failed to do above mentioned steps, better don’t proceed further. Because, you will be surely caught by Samsung’s FRP Lock Protection).

- Power-off the Galaxy J5 (2016).
- Reboot to Download Mode: For that Press Vol down + Menu Button + Power simultaneously for a couple of seconds.

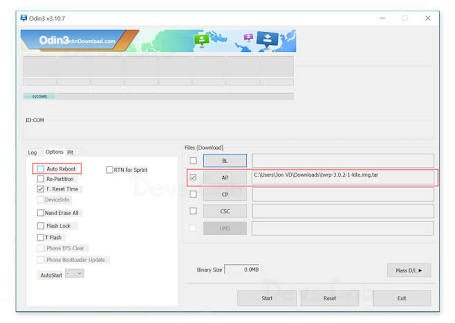
- On your PC, Download Odin and open it
- Disable ‘Auto reboot’ from option menu of Odin.

- Select TWRP 3.1.1 (.tar file) with AP tab of Odin and click Start.
- Wait for the program to complete the flashing process.
- Once Successfully flashed, you will see ‘Passed’ in Odin tab.
- Disconnect device and hold Vol down + power till screen goes off.
- Now immediately press Vol Up + Home Button + Power to reboot to TWRP.
- Swipe the slider to “allow modification”.
With all of the above steps you’ve successfully installed the custom TWRP recovery on your device. Now, we’ll be flashing SuperSu exploit to root the J5 (2016) with the help of TWRP.
2. Installing SuperSu v2.82 via TWRP on Galaxy J5
Let us assume that the device is now on TWRP recovery after completing the 1st Step.
Note: Before proceeding, it’s highly recommended to take a complete Nandroid Backup of the device.
- From TWRP main screen. Select Wipe menu and clear Dalvik/ART cache.

- Revert back to TWRP main screen. Then, select Install menu and navigate to the SD card path where you’ve earlier stored the SuperSU flashable file.
- Once chosen the correct file. Swipe to confirm the flashing.
- Again, clear the Dalvik/ART cache.
- Once SuperSu flash successfully, Reboot to System.
Important: Wiping the Dalvik Cache before and after the flash is required to avoid bootloops.
Once rebooted, check whether the root is successfully installed or not in the system. For that, look for the SuperSu app on your apps screen. Or otherwise, use the RootChecker app.
Install Custom ROMs
Samsung Galaxy J5 2016 have lots of compatibility with other different custom ROMs. Here we have complete list of custom ROMs for Galaxy J5 2016.
Downloads
Odin.exe v3.12.7: Download
Aroma supported Custom TWRP v3.1.1 for Galaxy J5 (2016): Download
SuperSu v2.82 SR5 (5th Stable Release): Download
