If you want to transfer your personal data from one Google Drive to another account, this article will help you as we have shared a few methods that will help you to transfer files from the platform. Firstly, users with personal accounts are not granted access to a native functionality that allows Google Drive to be moved between accounts. After following the methods or by sharing your files and folders with a different email address or by downloading and re-uploading them into a different account, you can shift the content of Google Drive to a different Drive account. Here’s a step-by-step guide to move files from Google Drive to another account.
What is Google Takeout?
Google Takeout makes it simple and straightforward to move files from Google Drive to other cloud storage services like Dropbox, OneDrive, and Box. Before we move on, you should remember that users can only move Drive files from an existing Google Workspace account to a brand-new account if both accounts are a part of the same organization. Eventually, only the organization’s administrator is capable of carrying out this step, and only after the older account has been suspended, allowing the data in it to be labeled as orphaned files, can ownership of the files be transferred to another account.
MAKE SURE TO READ: How to Use Nearby Share to Transfer Files from Android to Windows PC
Ways to Move Files from Google Drive to another account
Method 1: Download your Drive data via Google Takeout and transfer Drive to another account
You can download any data that has been saved from your account into Google using the “Takeout” postal service, which is provided by Google. You can use Takeout to locate the data you previously used in a Google product and download it or transfer it straight to the cloud storage account of your choosing.
Steps
- You have to open “takeout.google.com” on your computer’s web browser and log into your Google account to utilize Google Takeout to preserve your Google Drive content.
- Some of the data can be seen already selected when you visit the page. So, click Deselect all on the page since we are trying to move some Google Drive content from one account to another.

3. Click on Deselect all then scroll down to find the “Drive” section on this page after the selected items have been deselected. Click on the checkbox icon available right side to the Drive section.

By default, Google will choose the entirety of your Google Drive content for transfer. Click the All Drive data included button in the Drive section to copy only specific files and folders from Drive.

4. To manually choose the files and folders you want to move, uncheck the Include all files and folders in Drive checkbox in the Drive content settings box. Then you may select the sections you want to move by checking the boxes next to them and clicking OK at the bottom. Eventually, the transfer process will now choose the folders that you checked.

5. The next step is to select the chosen file formats for all the files you are about to transfer from Drive by selecting the Multiple Formats button located in the Drive section. This setting enables you to change the file type for documents, presentations, spreadsheets, and other items you created inside Google Drive using other Google services. However, the files you manually transferred to Drive will be stored in their original format.

7. A list of all the formats in which your data will be kept for a particular service will display in the overflow box that then appears. The DOCX format is chosen by default for documents created on Drive, but you can switch to PDF from this area. Ultimately, for other files generated in Drive, you can alter the file type; when done, click OK to move on.

8. Select Advanced options from the Drive section to confirm that all data contained on all files is included in the transferred content. Then, before clicking OK, check both the options in the Drive – advanced settings box and click OK.

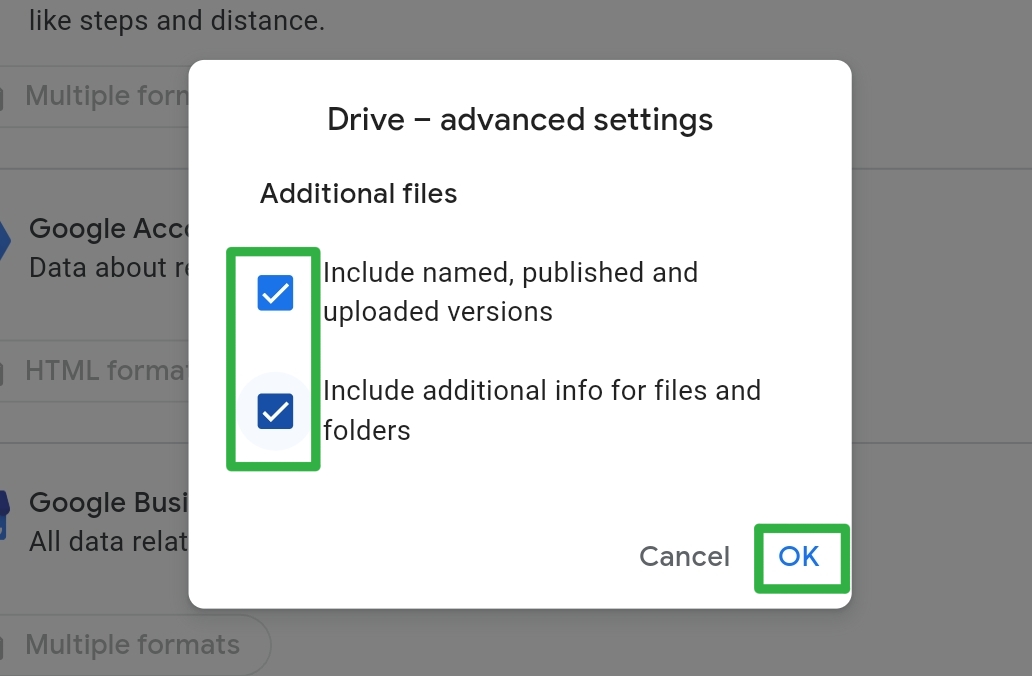
On the Google Takeout page, scroll to the bottom and click on Next step after selecting the necessary files and folder from Google Drive.

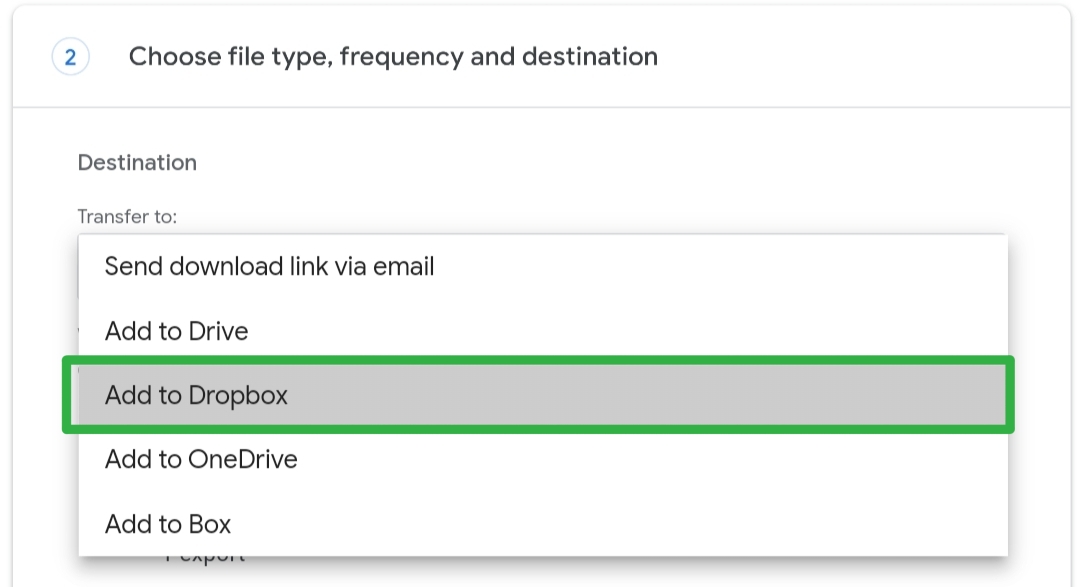
9. The Destination section should have the Send download link through email option selected. If you want to manually download the content and re-upload it on another Google account, you can choose not to use the option. Consequently, click on this dropdown menu under “Destination” to select your next option if you want to migrate this data to another cloud service.

10. Pick the cloud storage option (Dropbox, OneDrive, or Box) from the expanded menu that you wish to use to store the Drive data that you have chosen. Google will automatically transfer your files to your chosen cloud storage and give you a link so you can retrieve them later from the chosen storage service when you select an external cloud storage option. After selecting your destination type, go to the Frequency section and select Export. By doing this, you can prevent multiple transfers of the data on your Drive.

11. From this screen, you can select the file type and size that you prefer to transmit. Once everything is ready, select Link Accounts and then Export.

12. To start the transfer, you must first log in to the cloud storage provider you choose above and then adhere to the on-screen instructions.
You’ll get an email on your Google account after the transfer is successful letting you know you can view the transferred files on your destination account.
Method 2: Download Google Drive files and upload them manually
If you don’t wish to follow the above method, we do have another simple method to move files from Google Drive to another account. You may use the traditional method, which entails first downloading all of your Google Drive stuff to your computer and then uploading it again to your secondary Google account.
- To follow this method, open your default Google account in a web browser and go to drive.google.com.
- Move over any files or folders on your Drive home page and choose any checkbox that appears on the left.
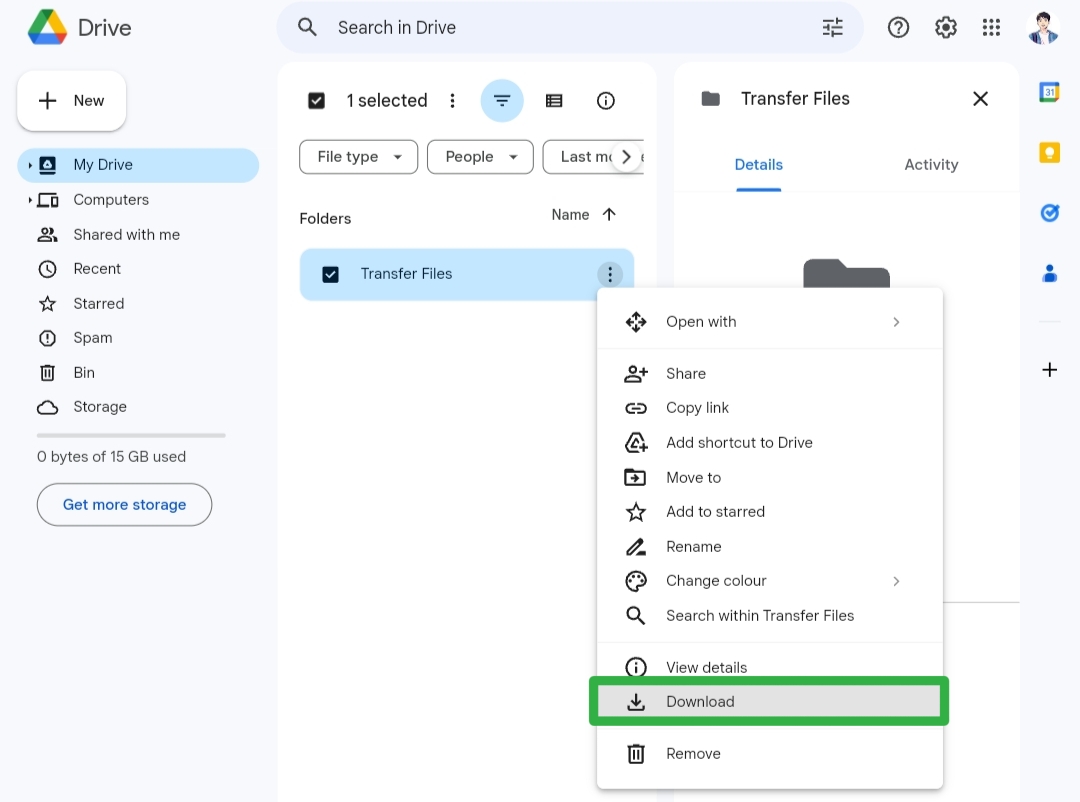
3. The chosen file or folder on this page will be highlighted as a result. Since you’ll be moving all of your Drive stuff to another account, you may choose all of your Drive files and folders by clicking on the checkbox with a minus (-) symbol in the top left corner of the screen.
4. By leaving the boxes of the objects you don’t want to transfer checked, you may further customize this option.
5. Click the Download icon at the top after choosing the transferrable material.
6. A ZIP file containing all of the stuff you’ve chosen will now be created by Google Drive, and your computer will download it automatically.
7.You can extract the ZIP file to a new location when it has fully downloaded. Then, drag and drop this folder or any of its contents to the Google Drive of your secondary account.
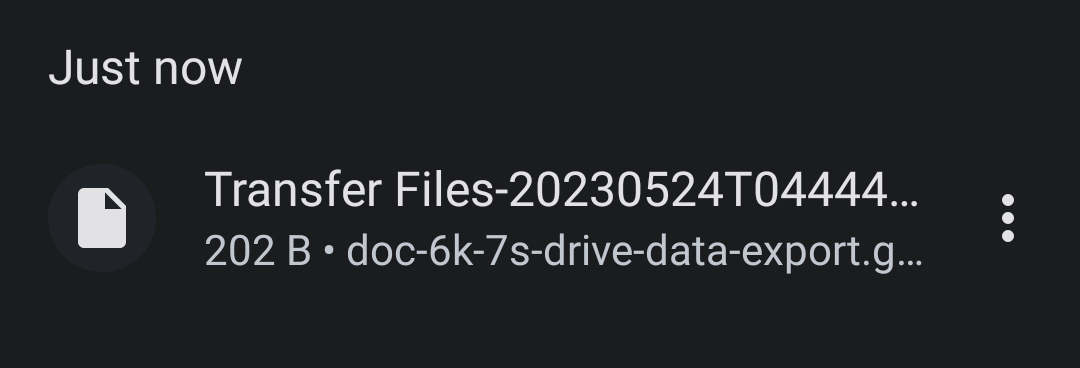
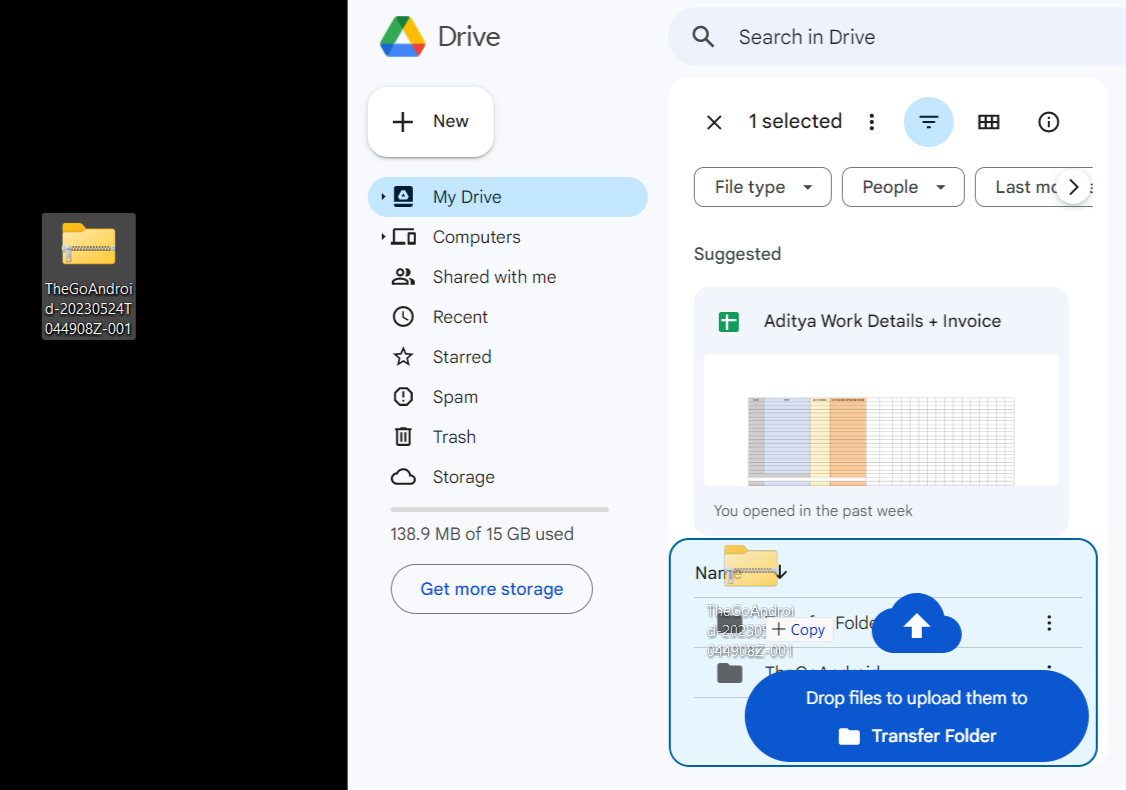
Depending on how much data you have saved from your previous account, this might take some time. To ensure that all of this stuff uploads correctly, you must ensure that your destination account has enough capacity.
Method 3: Create a folder for all files and share it with another account
Utilizing the Share option included inside Google Drive is the simplest way to move files from Google Drive to another account.
Step 1: Create a folder as Transfer Folder
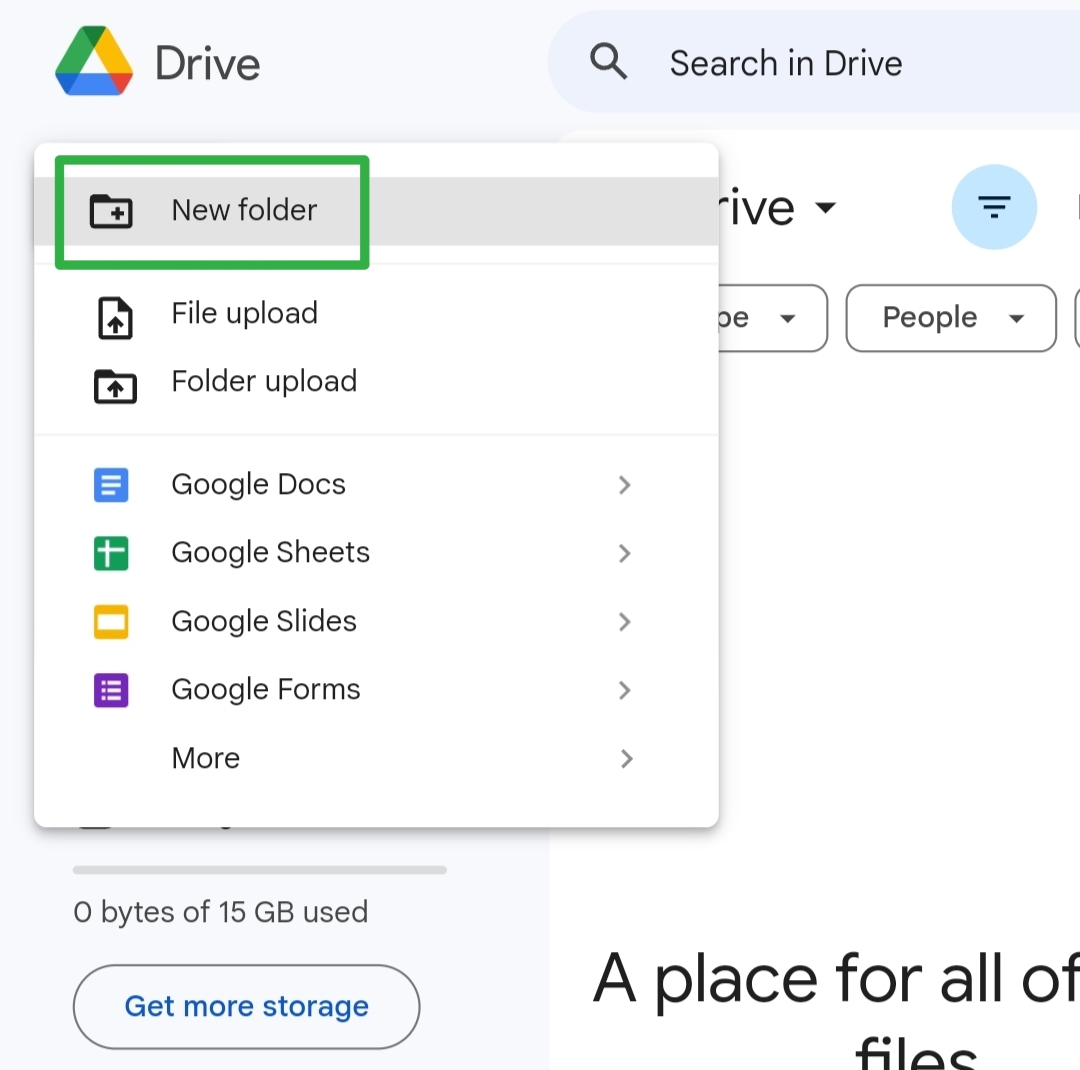
Open a web browser on your computer and go to drive.google.com. Click the + New icon in the upper left corner of the screen. Select a New folder from the overflow menu that displays. Then, click New folder on the resulting overflow menu. When establishing a new folder, you must provide a name in the New folder box that will display on the screen. We’ll call it “Transfer folder” in this case, and after giving it that name, we’ll click Create to continue. The newly created folder should now be displayed at the top of your Drive homepage.



Step 2: Move the relevant files to the Transfer Folder
Move over a folder or files from Google Drive to another account and select it by clicking the check box on its left side. At the point when that’s what you do, the chose record or envelope will be featured on your Drive landing page. By clicking on the checkboxes next to a number of files and folders, you can now select them from the screen.

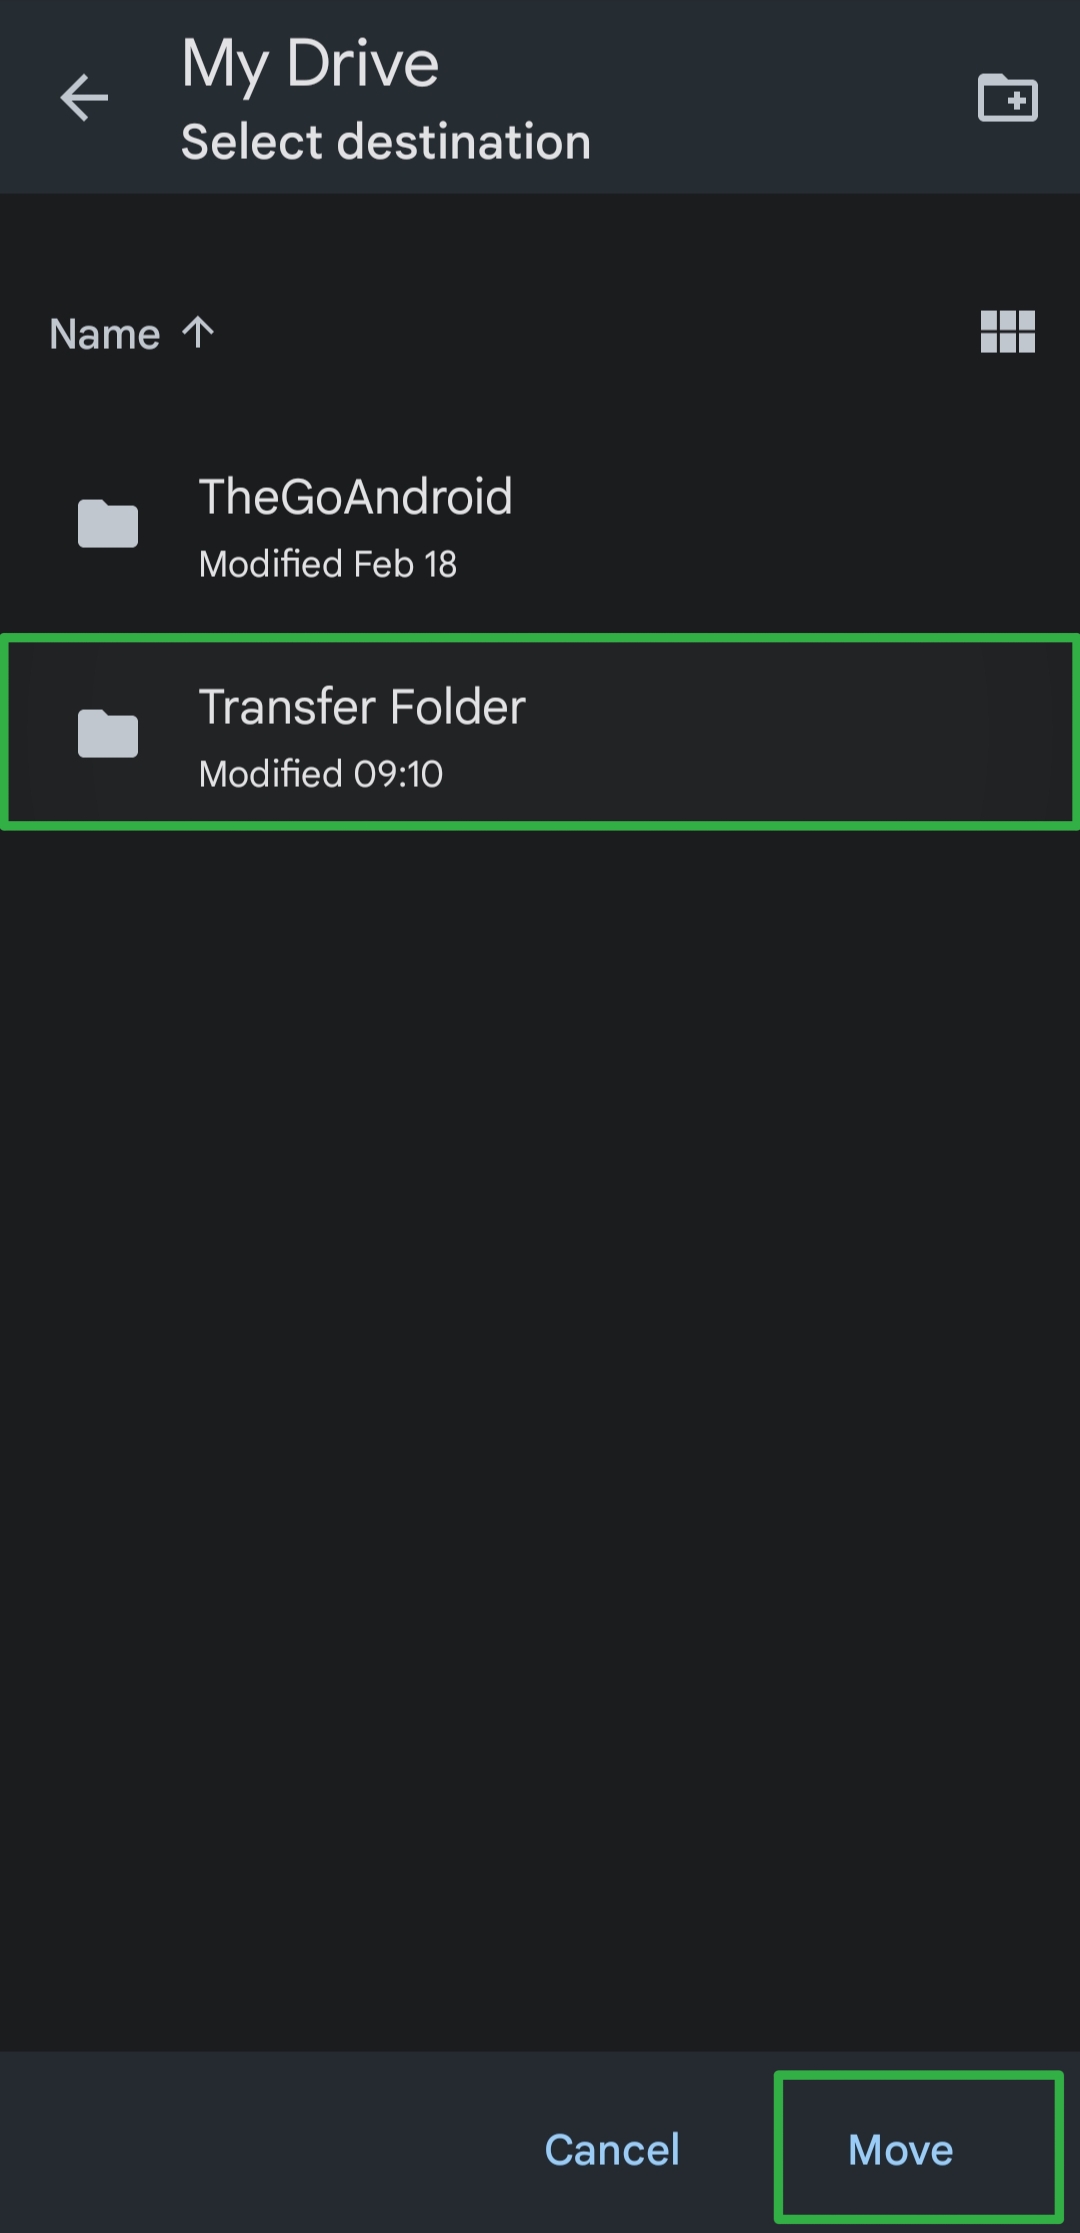
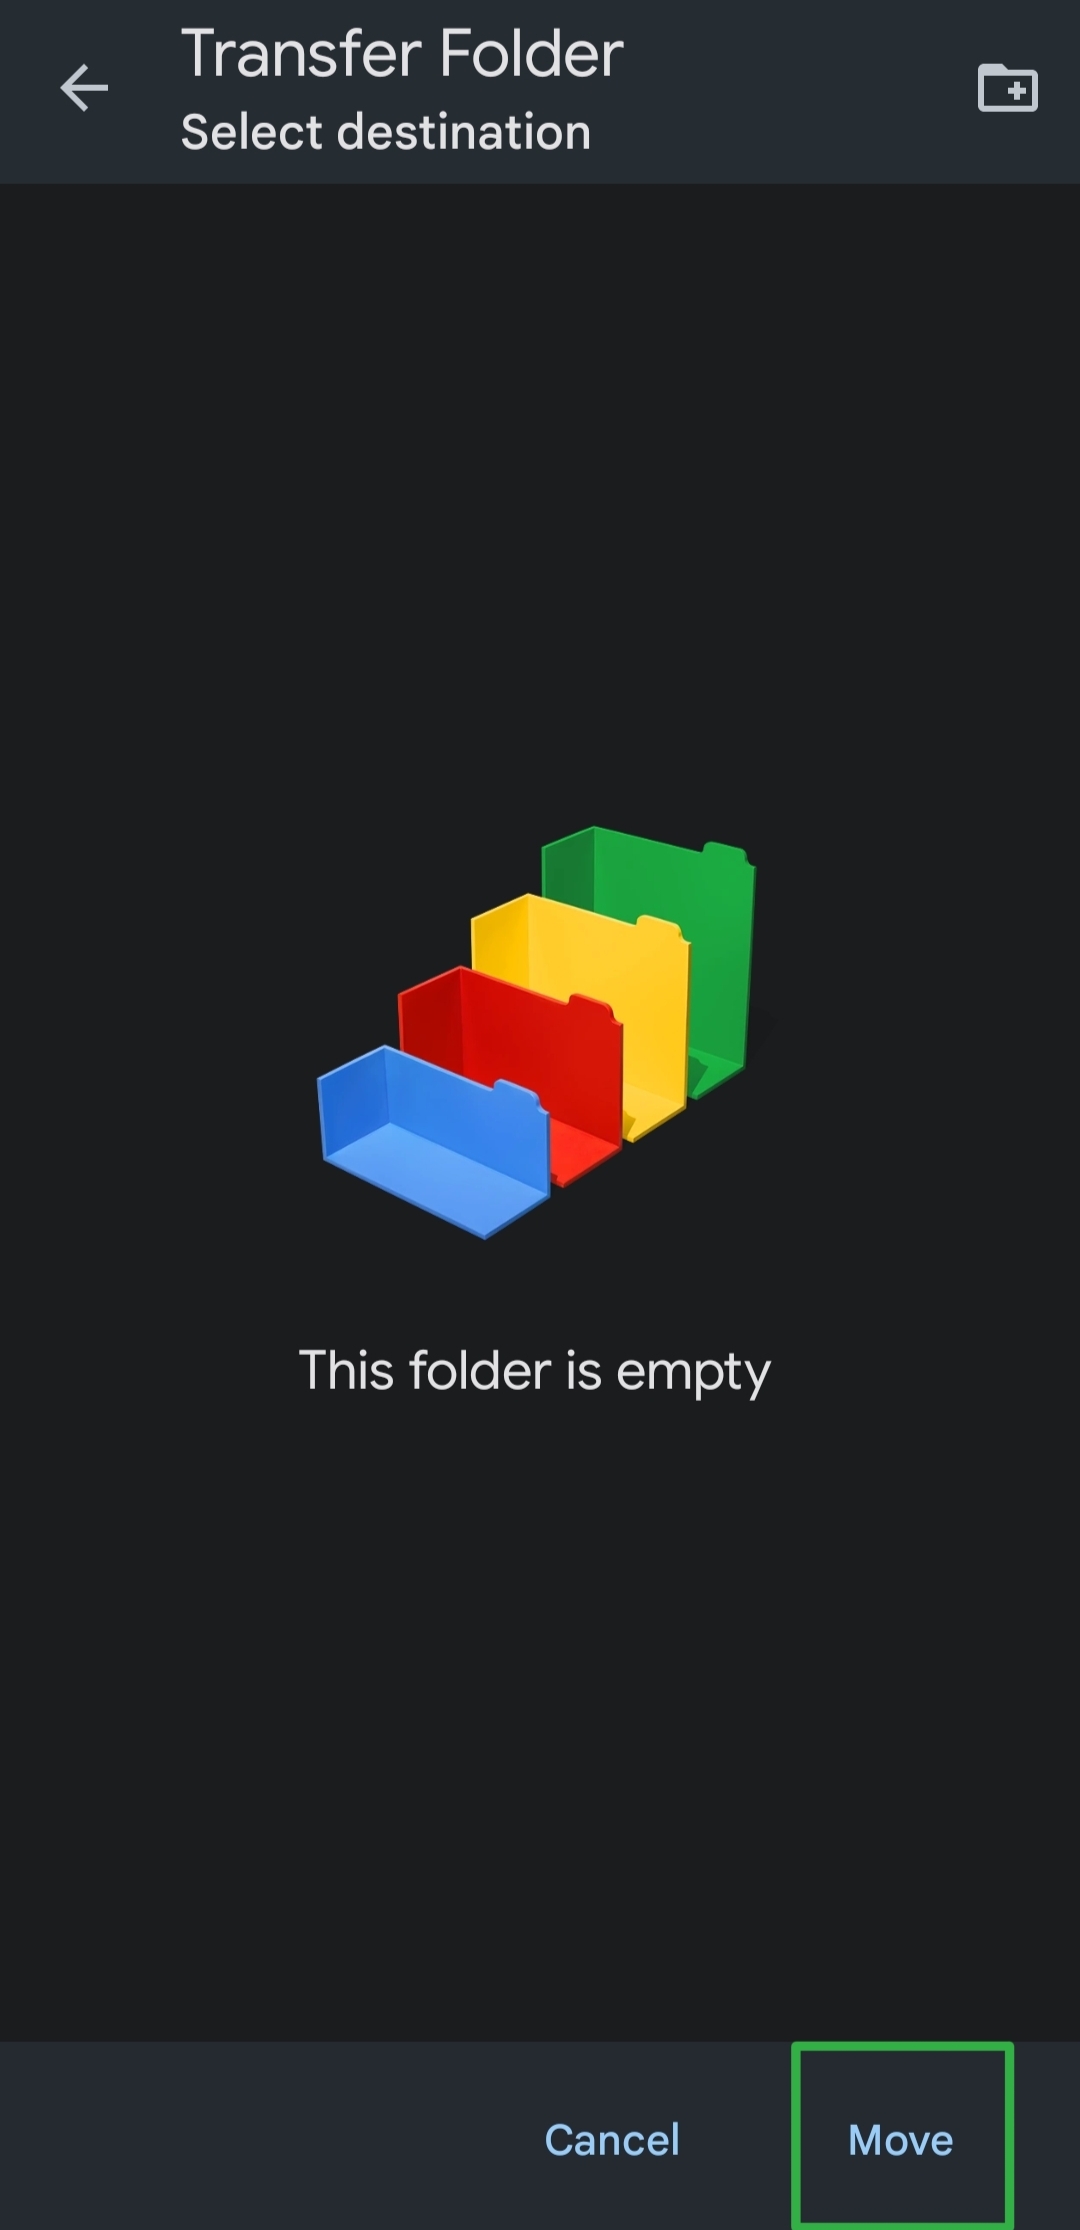
Whenever you’ve chosen every one of the records and envelopes you need to move, intuitive them onto the “Transfer Folder”. Alternatively, you can select Move from the overflow menu to move the selected files and folders to another folder by clicking the three dots icon at the top.
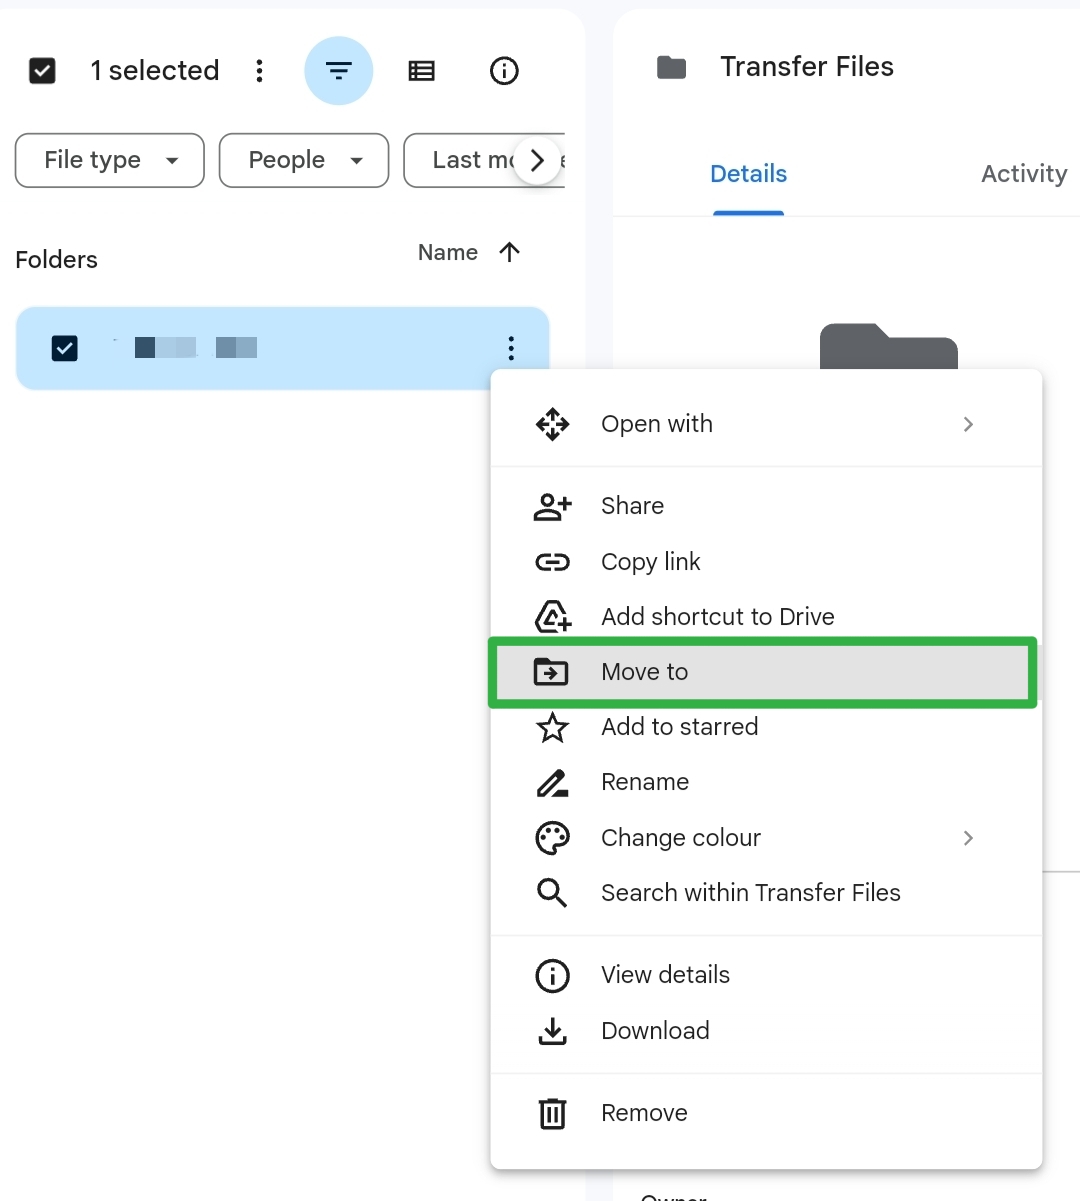
Check the box that opens to see if the “Transfer folder” is in the “Suggested” section. On the off chance that indeed, select this organizer and snap on Move at the base. If this is not the case, go to the All Locations tab, select the “Transfer folder,” then click on Move. The selected content from your Drive homepage will be moved into the Transfer folder you created in Step 1 when you do that.
ALSO READ: How To Fix ChatGPT session has expired Error
Step 3: Share the Transfer Folder with another account
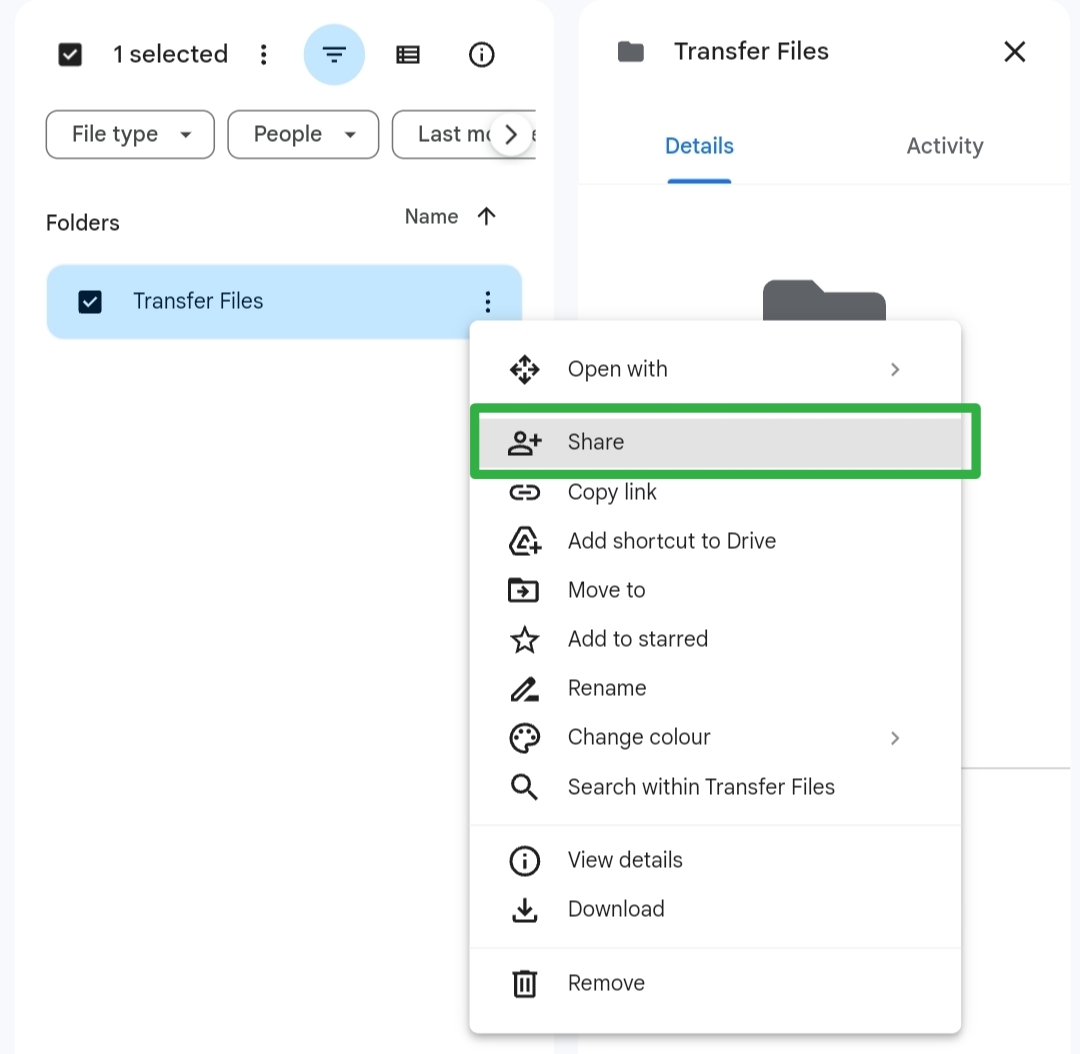
Rather than moving files from Google Drive to another account, you can now share your Transfer folder directly with the account you want to transfer content to after you have moved the necessary files there. Right-clicking on the Transfer folder and selecting Share from the overflow menu is the easiest way to accomplish this. Add/Search for the name or email address of the person with whom you want to share the selected folder in the box that appears for sharing, and then select their name from the search results. Their name should appear in the top box after they are selected. To confirm the folder’s sharing access, click Send now. You can now access the transferred files by logging in to your secondary account.

Conclusion
These are three methods to transfer or move files from Google Drive to another account. We hope our guide remained useful for you.
