Samsung’s version of Android is heavily customized and differ vastly from the Vanilla Android. On top of that, Samsung adds its own layer of security literally making tougher to get root access on Samsung devices. The latest and greatest Galaxy S10 is no exception with Samsung tightening the security than ever before. Nonetheless, the renowned dev – Topjohnwu has figured out a way to root the Galaxy S10 Exynos variant despite great challenges thrown by Samsung.

The latest Magisk Canary by Topjohnwu is capable of rooting the Galaxy S10s (S10e/S10/S10+). However, since the Galaxy S10s have different system architecture rooting with Magisk cannot be done by usual or the traditional method that we’re familiar. In a nut-shell, rooting Galaxy S10s, as of now, involves comprehensive steps and you need to be more cautious and thoroughly follow the each and every step.
Guide to Root Galaxy S10 using Magisk
Points to Remember
- Installing Magisk trips KNOX (Bye bye! Samsung Pay and other KNOX enabled apps forever).
- Installing Magisk for the first time REQUIRES a full data wipe, backup before continue
- Bootloader should be unlocked before following the instructions.
- Magisk will be installed to the recovery partition of your device, which is very different from what you used to know about rooting in general.
Prerequisites
- Download the Latest Odin 3.13.3: Download
- Magisk Manager: Download
- Download the latest Samsung USB Drivers.
Steps to Root Galaxy S10
Once your device is bootloader unlocked, let’s get straight to the rooting.
Warning: The steps are to be followed carefully. If you make a mistake, you lose device (Hard Brick) and nothing else, and we ain’t responsible. A full ODIN restore is mandatory if you intend to unroot the device.
- Download the firmware for your device.
- Unzip the firmware and copy the AP tar file to your device. It is normally named as
AP_[device_model_sw_ver].tar.md5 - Install Magisk Manager from the Canary Channel
- In Magisk Manager: Install → Install → Select and Patch a File
- Select the AP tar file. Magisk Manager will patch the whole firmware file and store the output to
[Internal Storage]/Download/magisk_patched.tar - Copy the tar file to your PC, and boot your device to download mode.
- Flash
magisk_patched.taras AP in ODIN
Important: Uncheck “Auto Reboot” in Options!!!! - Magisk is now successfully flashed to your device! But there are still several steps before you can properly use the device.
- We now want to boot into the stock recovery to factory reset our device.
Full data wipe is mandatory! Do not skip this step.
Press Power + Volume Down to exit download mode, and as soon as the screen turns off, immediately press Power + Bixby + Volume Up to boot to the recovery partition. Just as mentioned in the previous section, since we want to boot into stock recovery, continue pressing the volume up button until you see the stock recovery screen. - In the stock recovery menu, use volume buttons to navigate through menus, and the power button to select the option. Select Wipe data/factory reset to wipe the data of the device.
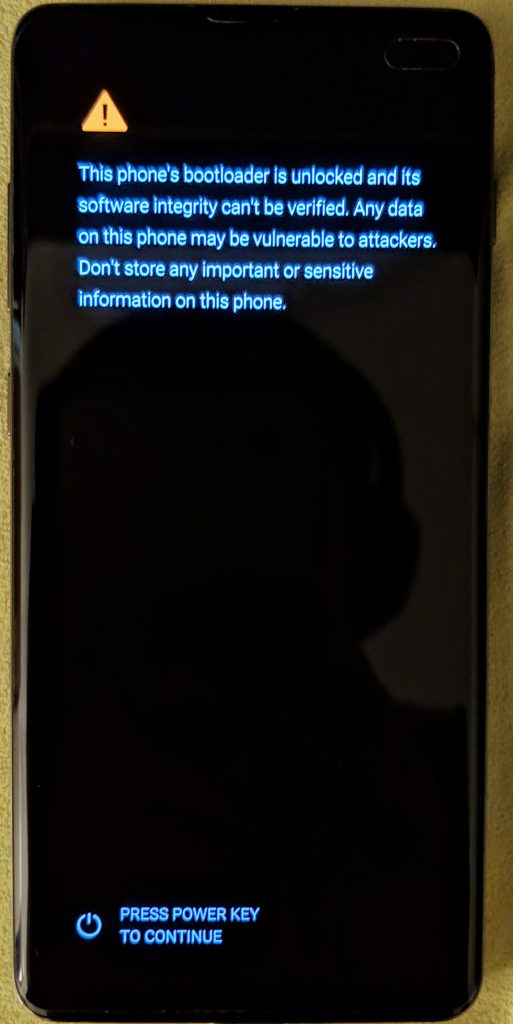
- This time, we can finally boot to the system with Magisk. Select Reboot system now, and immediately press Power + Bixby + Volume Up. After seeing the bootloader warning screen, release all buttons so it can boot to the system.
- The device will automatically reboot for the first time it boots. This is completely normal and done by design.
- After the device is booted up, do the usual initial setup. The following steps will need an internet connection.
- You shall see Magisk Manager in your app drawer; if not, manually install the APK you downloaded in step 3 and continue to the next step. The app would be a stub and it shall automatically upgrade to the full Magisk Manager when you open it.
- Magisk Manager will ask to do additional setups. Let it do its job and the app will automatically reboot your device.
- Magisk has been successfully installed on your device. Root access enabled!
You May Also Like
iFixit Teardown confirms Samsung Galaxy S10 repair to be expensive
How to unlock bootloader of Galaxy S10 Exynos variant
How to root Samsung Galaxy S8 & S8 Plus (Exynos)
How to boot your device after installing Magisk
As mentioned earlier, the Magisk is being installed on the Recovery partition, which is unconventional. To boot the system with Magisk, you will have to boot to recovery every time. Normal power on (with just power button on hold) will take you only to the system sans Magisk.
After you unlock the bootloader, every time the device powers on, you will see the following splash screen:
Basically, the bootloader decides where to boot before the warning splash screen, either it’ll be,systemrecovery or download. After installing Magisk, the following should be the boot key combinations in order to boot your device to the partition you wish to have.
- (Powering up normally) → (System with no Magisk)
- (Power + Bixby + Volume Up) → (Bootloader warning) → (Release all buttons) → (System with Magisk)
- (Power + Bixby + Volume Up) → (Bootloader warning) → (Keep holding volume up) → (Actual recovery)
Also Read: How to Fix “Unfortunately Camera Has Stopped” Error on Galaxy S10, S10e, and S10 Plus
We hope you successfully rooted your Samsung Galaxy S10 with Magisk. If you have any feedback or any query, you can ask us via the comment section below.


